QuickBooks Desktop invoice templates are a great way to manage your invoice process efficiently. They save you time and ensure that your invoices look professional and contain all the information you and your customers need.
In this blog, you’ll get a walkthrough of:
- How to customize invoice in QuickBooks Desktop.
- How to edit invoice template in QuickBooks Desktop.
- How to change invoice message in QuickBooks Desktop.
By the end, you’ll also learn how to use integrated software to get paid on time, every time.
So let’s get started!
What is a QuickBooks invoice template?
Before learning how to edit invoice template in QuickBooks, it’s important to understand what an invoice template is.
All business owners know that keeping tabs on transactions and payments can be daunting. With QuickBooks Desktop invoice templates, it doesn’t have to be.
These templates reduce your manual work and eliminate issues around human error, so you end up with easy, polished invoices that include:
- Information regarding your products or services.
- Your terms of payment, including accepted methods of payment, currency, and the due date.
- Any additional necessary information.
Additionally, QuickBooks invoice templates keep everything neatly in one location. These templates come prepped and ready to use, but you still have the flexibility to tailor them to your preferences through design or layout modifications.
With QuickBooks Desktop invoice templates, you:
- Enhance client satisfaction.
- Foster strong customer bonds.
- Add credibility to your invoices.
Now, let’s find out how to edit invoice template in QuickBooks Desktop!
How to edit invoice template in QuickBooks Desktop
Figuring out how to edit invoice template in QuickBooks is simple with these steps:
Step 1: Launch QuickBooks and navigate to the “Customers” menu. Then, select “Create Invoices.”
Step 2: Find the “Formatting” tab at the top of the window and click it. A drop-down menu will open, where you should choose “Manage Templates.”
Step 3: The “Manage Templates” window will display a list of all the invoice templates available. Browse through your options, choose the one you want to change, and then click “OK.”
Step 4: Once you’ve selected a template to edit in QuickBooks, the “Basic Customization” window appears. Add your business logo and make any visual adjustments that align your invoice’s look with your branding. For more advanced options, click “Additional Customization.”
Step 5: After fine-tuning your template, click “OK” to save your changes. Any QuickBooks Desktop invoice templates you create will be available indefinitely for all future invoices.

Are there pre-designed QuickBooks Desktop invoice templates that I can use?
Yes, QuickBooks Desktop comes with a variety of pre-designed invoice templates. These templates range from simple and professional layouts to more elaborate designs. So, you can choose one that best fits your business’ needs.
How to edit invoice template in QuickBooks Online
You’ve learned how to edit invoice template in QuickBooks Desktop. Now, let’s look at how to edit invoice template in QuickBooks Online.
Step 1: Go to the gear icon at the top right corner. Select “Custom Form Styles” under “Your Company.”
Step 2: Choose the invoice template you want to edit by clicking “Edit” on the right side of the template name. If you haven’t customized one yet, you’ll work with the default “Standard” template.
Step 3: Click on the “Design” tab to change the overall look of your invoice. Here, you can change the template’s style, logo, colors, and fonts.
Step 4: Select the “Content” tab to edit the information on the invoice. This includes the header, footer, and line items on the invoice.
Step 5: Use the “Preview PDF” button to see how your edited invoice template will look when you send it to customers. This helps ensure everything is positioned and formatted as expected.
Step 6: Once you’re satisfied with your edits, click the “Done” button at the bottom to save your customized invoice template.
How to change invoice template in QuickBooks Desktop
Changing your invoice template in QuickBooks Desktop involves selecting a different template for your invoices. Here’s how:
Step 1: While creating or editing an invoice, click on the “Customize” button at the top of the invoice window.
Step 2: Select “Manage templates” and choose a different template from the list.
Step 3: Click “OK” to apply the new template to your invoice.
How to change an invoice email template in QuickBooks Desktop
Another important aspect of learning how to edit invoice template in QuickBooks is changing an invoice email template.
Customizing the email template for invoices in QuickBooks Desktop enhances your communication. Here are the simple steps to do so.
Step 1: Under “Edit,” click “Preferences” and then “Send Forms.”
Step 2: Choose the “Company Preferences” tab and select the “Email Templates” button.
Step 3: Select “Invoice” from the template list and click “Edit.”
Step 4: Customize the email template according to your preferences and click “OK” to save your changes.
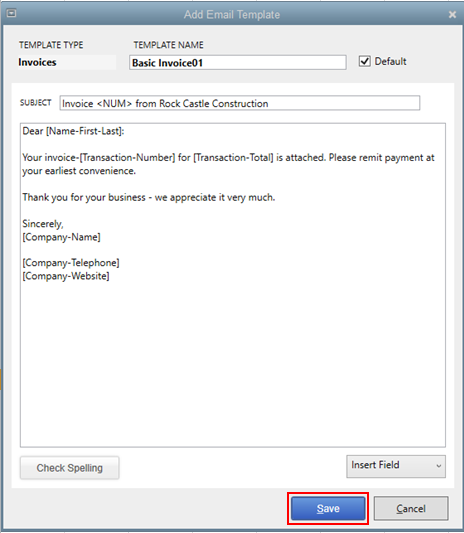
Image credit: QuickBooks
How to customize invoice in QuickBooks Desktop
Learning how to customize invoice in QuickBooks Desktop lets you attend to your business needs more effectively. It also adds a personal touch that your customers are sure to appreciate.
Here’s how you can customize your QuickBooks invoices:
Step 1: Launch QuickBooks Desktop and open your company file.
Step 2: From the top menu bar, go to the “Customers” menu and select “Create Invoices.”
Step 3: At the top of the “Create Invoices” window, click on the “Formatting” tab. A drop-down menu will appear.
Step 4: Select “Manage Templates.” Choose the template you want to modify and click “OK.”
Step 5: The “Basic Customization” window opens after choosing a template.
Step 6: If you want advanced options, click “Additional Customization.” Here, you can customize your invoice’s header, columns, footer, and more.
Step 7: Preview your customizations to see how your invoice will look. When you’re satisfied, click “OK” to save your changes.
Once you’ve created a customized invoice template, you can select it from the template drop-down menu at the top of the invoice screen.
Customizing your invoices not only helps you stay consistent with your branding. It also makes things clearer and more informative for your clients.
How to change company name in QuickBooks Desktop
If your company undergoes a name change, it’s essential that you update it in QuickBooks. To do so, follow the steps below.
Step 1: Sign in to your QuickBooks account and select the gear symbol at the top of the screen.
Step 2: Click on either “Account Settings” or “Company Settings.”
Step 3: From the left menu, select “Company.” Then click on “Edit” or the pencil symbol to change or refresh your company’s details.
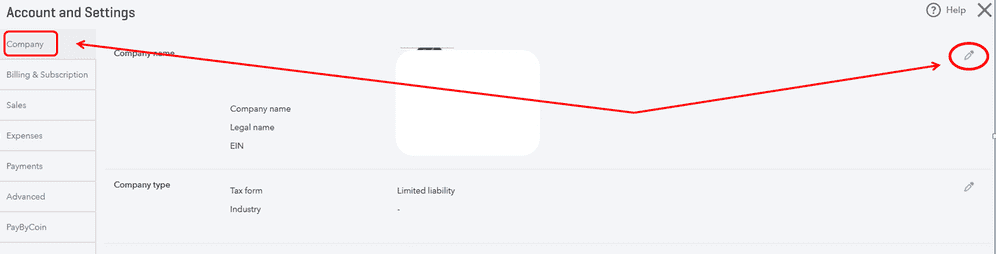
Step 4: If your company’s legal name is staying the same, check the box next to “Same as Company name.” If it has changed, uncheck that box and input the new legal name.
Step 5: Hit “Save,” then “Done.”
Consider alternatives for custom invoices in QuickBooks Pro and Premier
Because QuickBooks Desktop Pro Plus, Premier Plus, Mac Plus, and Enhanced Payroll are no longer available since September 30th, 2024, it’s crucial to explore alternatives that let you customize invoices. To be safe, consider integrating with invoicing apps that work with all versions of QuickBooks, such as Method.
That said, this change only affects new sales in the US. Existing QuickBooks Desktop users can continue their operations uninterrupted, with ongoing access to updates and support from Intuit.
Customize your QuickBooks invoices, estimates, and reports with Method
Method CRM is the best tool for QuickBooks users to take forms like invoices, estimates, and reports to the next level.
It seamlessly integrates with QuickBooks and elevates personalization with these key features:
- Drag-and-drop customization to tailor your forms to specific needs.
- Real-time sync with QuickBooks so your records are always accurate and up to date.
- 360-degree customer views that empower you with actionable data.
How to change invoice message in QuickBooks Desktop
If you’re looking to change the email message of your invoices, you can change it for all of them by going to “Account and settings” in the gear icon, then “Sales.” There is a pencil icon to change your email text in the “Messages” section.
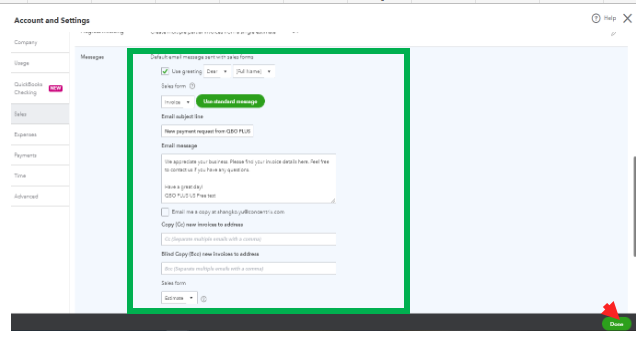
Image credit: QuickBooks
Unfortunately, the process of how to change invoice message in QuickBooks Desktop isn’t as easy as you might expect. You’re unable to edit the email message to an existing invoice template, but you can create a new template with new messaging. Here’s how:
Step 1: Open QuickBooks Desktop and go to the “Customers menu,” then select “Create Invoices.”
Step 2: In the “Create Invoices” window, select the invoice you want to modify.
Step 3: Find the “Customer Message” field at the bottom of the invoice.
Step 4: Click the drop-down menu to select an existing message, or choose “Add New” to create a new message.
Step 5: Enter your new message and click “OK” to save it.
So, while it’s a bit of a roundabout way to learn how to change invoice message in QuickBooks Desktop, it is possible to send personalized invoices with unique messaging. However, if you don’t want to juggle countless templates, Method is an easier way to customize estimates, invoices, work orders, and more. Not to mention, you get more control over what you want to customize.
How QuickBooks Desktop users get paid sooner with Method
QuickBooks Desktop users get paid faster when they leverage Method’s seamless integration and advanced features.
Here’s how this solution facilitates quicker payments:
- Real-time sync with QuickBooks Desktop for up-to-date records.
- Online payment options that let customers pay instantly from their invoices.
- Automated billing process that lets you send invoices immediately upon completing services.
- Automated reminders for upcoming and overdue payments.
- The ability to create personalized invoices with payment terms, due dates, and descriptions.
- Customer portals, where clients can view their outstanding balances and make payments directly.
How to change invoice template in QuickBooks Desktop FAQs
How do I create an invoice template in QuickBooks Desktop?
To create a new invoice template in QuickBooks Desktop, follow these steps:
Step 1: Open QuickBooks Desktop and go to the “Lists” menu. Select the “Templates” option.
Step 2: In the “Templates” window, click on the “Templates” drop-down menu at the bottom left and choose “New.”
Step 3: Select “Invoice” as the template type and click “OK.”
Step 4: Customize your invoice template. Once you’re satisfied with it, give your new template a name and click “OK” to save it.
Looking for how to change invoice message in QuickBooks Desktop? You must also follow this process, as there is no way to edit the email message of an existing template.
How to edit estimate template in QuickBooks Desktop
Here’s how to edit an estimate template in QuickBooks Desktop:
Step 1: Go to the “Lists” menu and select “Templates.”
Step 2: From the list of templates, find the estimate template you want to edit and double-click on it.
Step 3: Make changes to your template, like adjusting the layout, changing text fonts, or adding new fields.
Step 4: Click “OK” to save your changes.
How do I make a change to an existing invoice template?
To modify an existing invoice template in QuickBooks Desktop, follow these instructions:
Step 1: Access the “Lists” menu and choose “Templates.”
Step 2: Double-click on the template you want to change.
Step 3: Customize the template to your liking by modifying the layout, adding or removing fields, changing fonts, or incorporating your company logo.
Step 4: After making your changes, click “OK” to save the updated template.
See how Method automates your invoicing for faster payments.
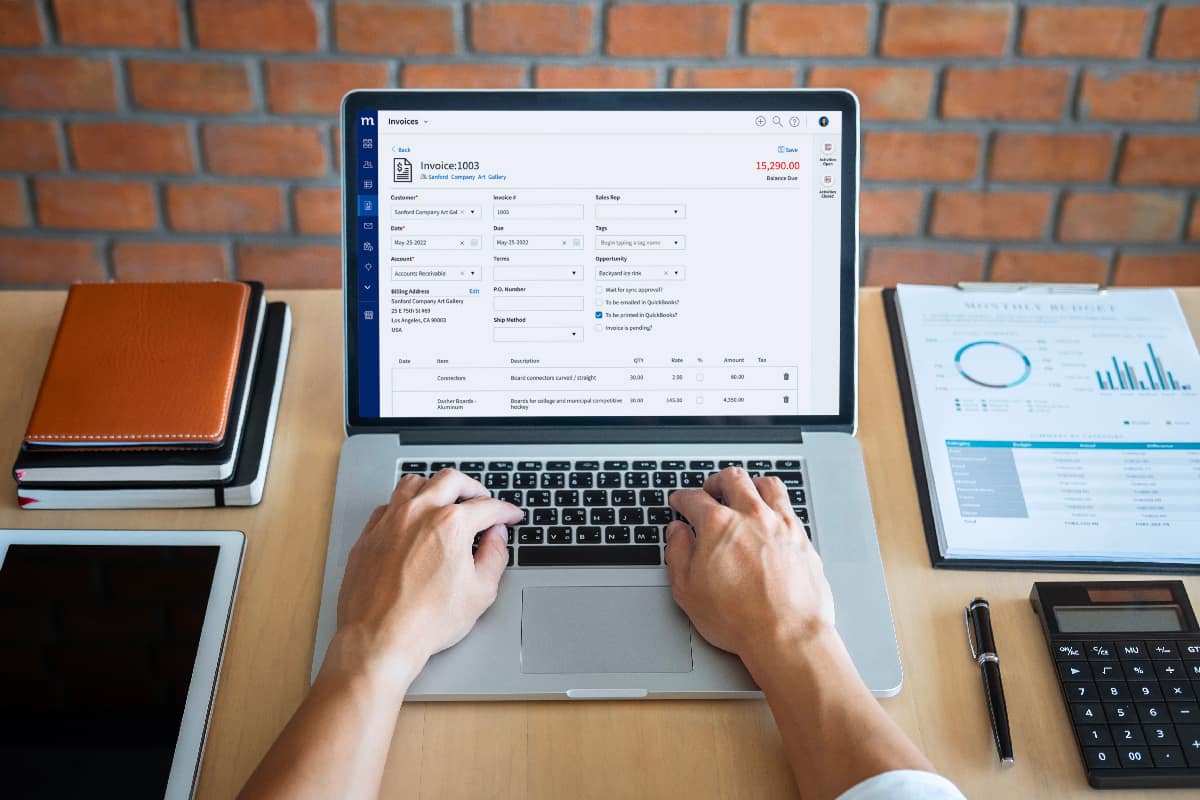
Image credit: Ngampol via Adobe Stock