Invoice templates in QuickBooks offer a variety of features to simplify your invoicing process. In this blog, you’ll learn:
- How to change invoice template in QuickBooks.
- Ways to add branding to your invoice templates in Quickbooks.
- How software helps you get paid faster.
By the end of this blog, you’ll be a QuickBooks template invoice expert.
Let’s get started!
How to change invoice template in QuickBooks
Changing the invoice template in QuickBooks is simple and makes your invoices more personalized. Here’s how to do it:
Step 1: Open QuickBooks and navigate to the “Customers menu”. Select “Create Invoices”.
Step 2: At the top of the ”Create Invoices” view, look for the Formatting tab. Click on it to open a dropdown menu. Then, choose “Manage Templates”.
Step 3: You’ll find a list of all your available invoice templates. Select the template you want to change and click “OK”.
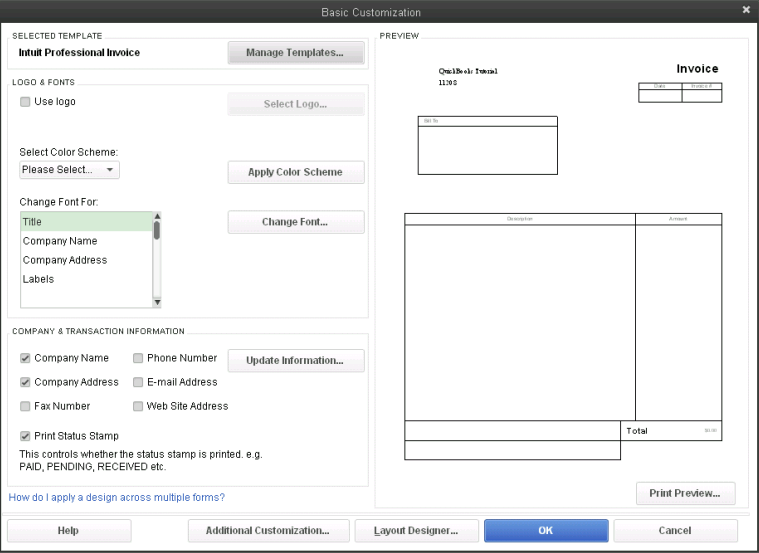
Step 4: After you select a QuickBooks invoice template to change, the “Basic Customization” menu opens. This window lets you add your company logo and adjust your invoice’s appearance to match your brand. For more layout and content options, select “Additional Customization”.

Step 5: When you’re happy with your customization, click “OK” to save your changes. Your QuickBooks template invoice is now ready to use.
Now that you know how to change invoice template QuickBooks, let’s look at what else you can do.
How to customize your invoice templates in QuickBooks
Personalizing your invoice templates in QuickBooks helps your business stand out. Follow these steps:
Step 1: Launch the application and go to the “Customers” menu.
Step 2: Click “Create Invoices” from the “Customers” menu.
Step 3: Find the Formatting tab at the top of the “Create Invoices” window and click to open a dropdown menu.
Step 4: From the dropdown menu, select “Manage Templates”.
Step 5: You’ll see a list of existing invoice templates in the “Manage Templates” window. Choose the one you want to modify and click “OK”.
Step 6: In the “Basic Customization” Window, add your company logo, choose fonts and colors, and tweak your invoice’s layout.
Step 7: To add, remove, or rearrange data fields, click “Additional Customization”.
Remember to save your changes once you’ve customized your invoice template. This template will then be ready for future invoices.
What to personalize on your QuickBooks invoice
You want to take advantage of QuickBooks invoices’ flexibility and custom form styles. A little customization goes a long way in improving your brand reputation and customer experience.
Here are some ways to personalize invoice templates in QuickBooks:
- Add your logo for a professional look and to reinforce your brand.
- Use your brand colors and fonts for brand consistency.
- Add specific details with QuickBooks template invoice custom fields.
- Include the issue date and an invoice number for easy tracking.
- Outline your payment terms, such as due dates and late payment policies.
Automate your QuickBooks invoicing with Method
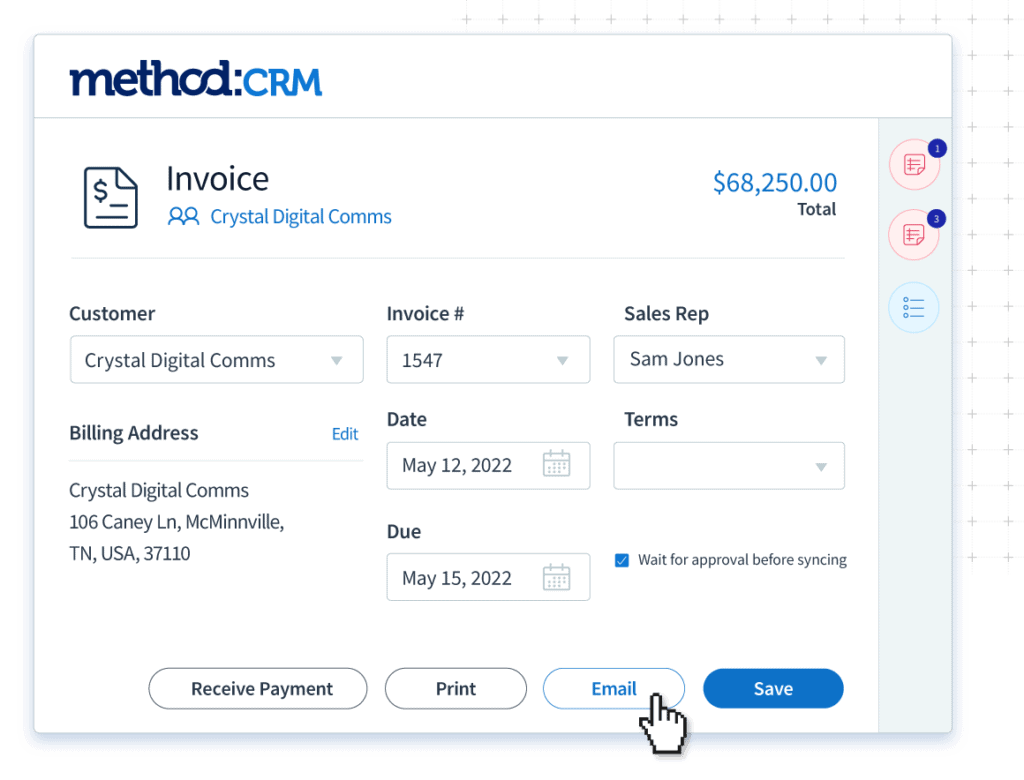
If you’re looking for a way to simplify your invoice creation process, Method is the best invoicing tool for you. With its powerful, two-way sync, Method lets you:
- Personalize invoice templates to take your branding to the next level.
- Automatically send invoices as soon as you complete a sale or service.
- Collect payments online directly from the invoice.
- Integrate with QuickBooks to track all customer interactions in one place.
The best part is that changes to your invoices or customer data in Method automatically update in QuickBooks and vice versa. So you never have to worry about inaccuracies or double-entry.

How to duplicate your invoice template
Duplicating a QuickBooks template invoice can simplify your workflow when modifying an invoice template for a new form. This approach is useful when you need multiple forms with similar design elements but varying details.
For instance, to modify a QuickBooks template invoice for packing slips, follow these steps:
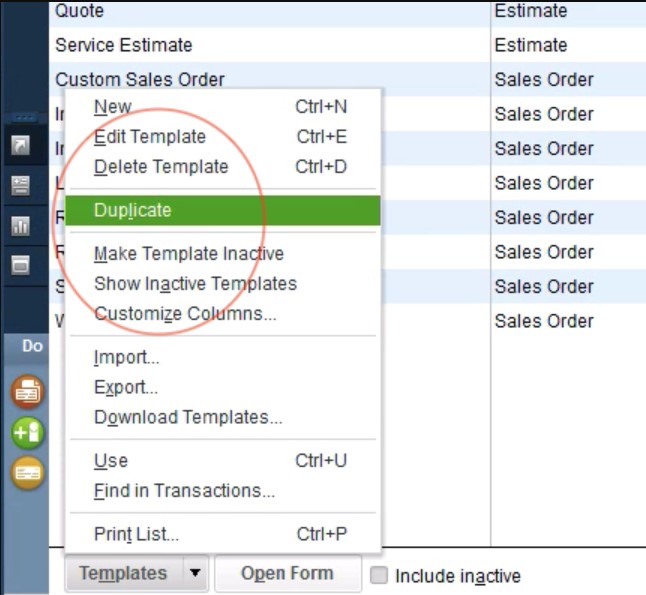
Step 1: Go to your form-creation platform’s “Lists” menu and choose “Templates”. Select the template you wish to replicate.
Step 2: Select “Duplicate” from the “Templates” dropdown.

How to import or export form templates
The ability to import or export invoice templates adds efficiency when you change invoice template in QuickBooks.
This feature saves you from the hassle of adjusting forms for each company file. Here’s how to import form templates:
Step 1: Open the company file.
Step 2: Click on the “Templates” option under the “Lists” menu, and choose “Import”.

Step 3: Select the template you want to import and click “Open”. You may rename your imported template.
Step 4: Click “OK”.
If you want to export a template:
Step 1: Navigate to “Templates” under the “Lists” menu and select the template you wish to export.
Step 2: Click the “Templates” dropdown and choose “Export”.
Step 3: Create a file name and save it on your computer. Click “Save” to finish exporting.
QuickBooks template invoice FAQs
How do I change, edit and customize a QuickBooks template invoice?
To change, edit, and customize a QuickBooks template invoice, open the application and navigate to “Customers”. Click “Create Invoices”, and select “Manage Templates” from the Formatting tab. Then, choose your desired template, customize it, and save your changes. Select “Additional Customization” for detailed adjustments.
What is a Quickbooks invoice used for?
You can use QuickBooks invoices to bill customers for products or services provided. The invoice details what you sold, the amount due from the customer, and the payment due date.
Invoices play a crucial role in managing cash flow and keeping track of sales in a business.
What are the various types of invoices found in QuickBooks?
QuickBooks offers various types of invoices, including:
- Standard Invoice: For billing customers for goods or services.
- Estimate: A proposed invoice for the expected costs of a job.
- Sales Receipt: Proof of purchase and payment received immediately.
- Credit Memo: Issued for customer refunds or to reduce their balance.
- Delayed Credit: A memo for credit to be invoiced later.
- Delayed Charge: Tracks unbilled goods or services for later.
- Statement Charge: A transaction entered directly into the customer’s register, included in their statement.
See how Method simplifies your invoicing so you can focus on higher-value tasks..
Image credit: dusanpetkovic1 via Adobe Stock


