QuickBooks automated reports: How to get started

Make navigating your business finances easy with QuickBooks automated reports.
These reports’ tailored insights and real-time data ensure that you have everything you need to make informed decisions for your business.
In this blog, you’ll learn how to:
- Set up QuickBooks Online automated reports.
- Set up QuickBooks Desktop automated reports.
- Modify and customize your QuickBooks reports.
But that’s not all — sometimes, the level of financial analysis you require goes beyond the standard capabilities of your accounting software.
Stay tuned until the end to find out how you can expand what’s possible in QuickBooks.
How to set up automated reports in QuickBooks
QuickBooks automated reports streamline your financial tracking and save time on manual tasks.
Let’s explore how to set up automatic reports in both QuickBooks Online and QuickBooks Desktop.
For QuickBooks Online automated reports
To set up QuickBooks Online automated reports:
- Navigate to “Business overview” and click “Reports”.
- Pick “Custom reports” and find the report you want to automate.
- In the “Action” column, select the dropdown menu next to “Edit”.
- Click “Create schedule”.
- Set your chosen cadence and fill out the email information.
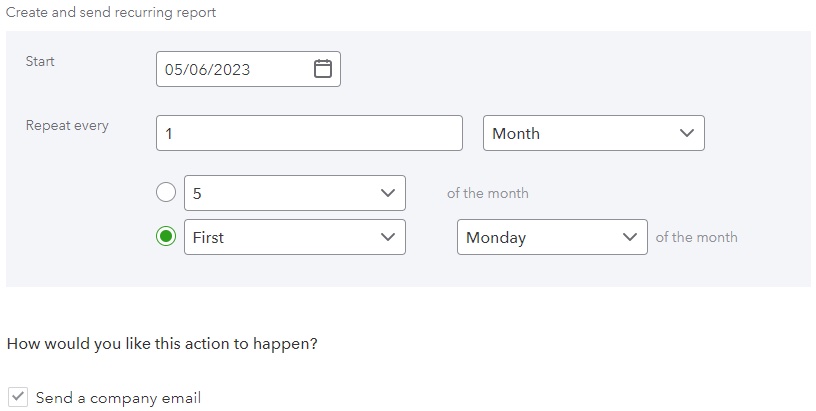
Image credit: Intuit
- Click “Save and enable”.
For QuickBooks Desktop automated reports
To set up QuickBooks Desktop automated reports:
- Open the “Reports” menu and select “Scheduled Reports”, followed by “Schedule Setup”.
- Choose the reports you wish to automate and select “Next”.
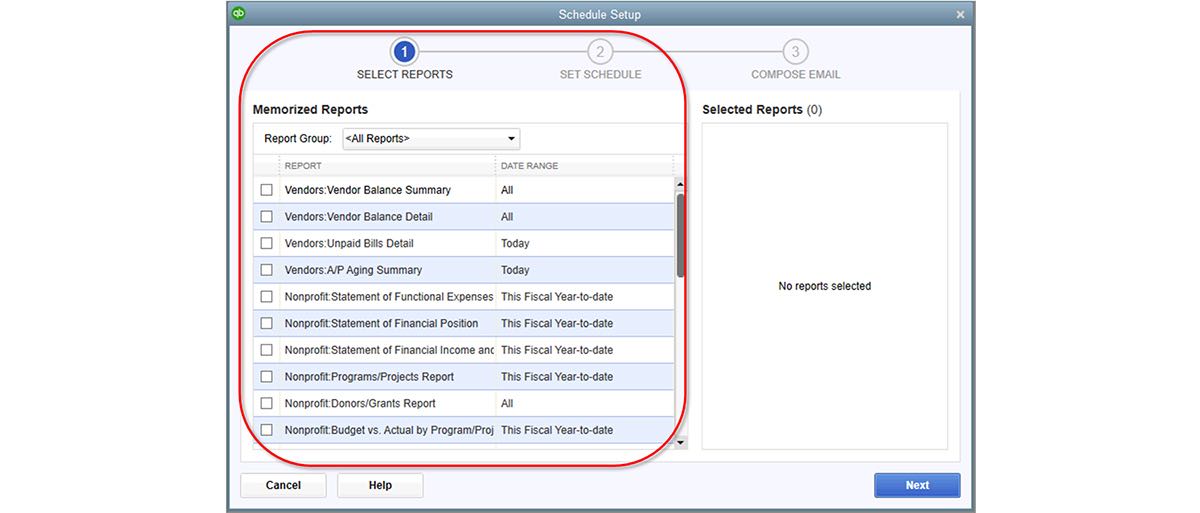
Image credit: Intuit
- Name your scheduled report, then choose the start date and cadence. Click “Next”.
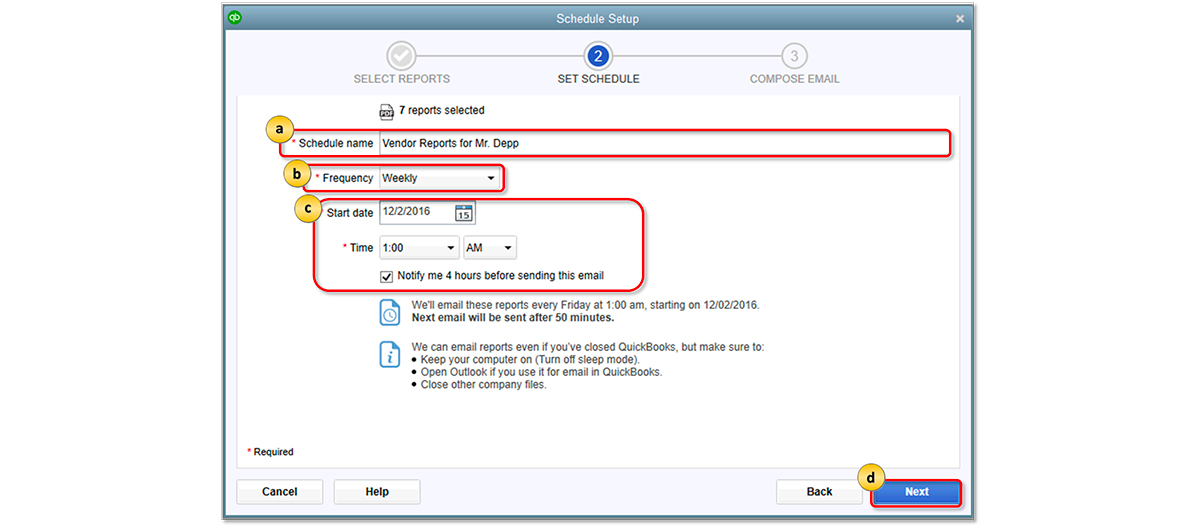
Image credit: Intuit
- Enter the email address of your chosen recipient, a fitting subject line, and your email’s body text. Note that you must assign a password for report attachments.
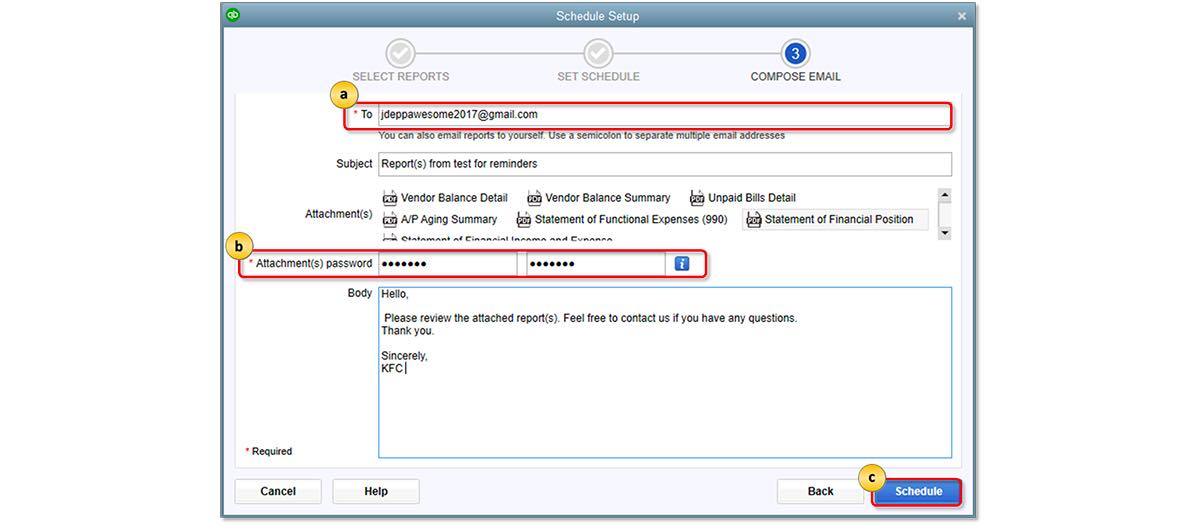
Image credit: Intuit
- Once you’re satisfied with your email, click “Schedule”.
- Confirm that your preferences allow for scheduled reports:
- Open the “Edit” menu and click “Preferences”.
- Select “Integrated Apps” and click “Company Preferences”.
- Ensure you have the “Scheduled Reports” checkbox marked before clicking “Properties”.
- Confirm that both permissions are selected in the “Access Rights” tab.
- Select “OK” to save your preferences.
How to modify automated reports in QuickBooks
Here’s how you can modify your QuickBooks automated reports in both the Online and Desktop versions.
For QuickBooks Online automated reports
To modify QuickBooks Online automated reports:
- Navigate to “Business overview” and click “Reports”.
- Pick “Custom reports” and find the report you want to modify.
- In the “Action” column, select “Edit”.

Image credit: Intuit
- Make your desired changes and click “Save”. These will automatically apply to your scheduled emails.
For QuickBooks Desktop automated reports
To modify QuickBooks Desktop automated reports:
- Open the “Reports” menu and select “Scheduled Reports”, followed by “Schedule Setup”.
- In the “Action” column, click “Edit Schedule”.

Image credit: Intuit
- Make your desired changes and click “Save”.
If you want to pause a Scheduled report, you can simply remove the check in the “Active” box.
How to customize reports in QuickBooks
When you customize your QuickBooks automated reports, you:
- Add an extra layer of efficiency and accuracy.
- Tailor your financial data to your business needs.
To customize reports in QuickBooks Online, navigate to the “Reports” tab and click “Edit” on the report you wish to personalize.
You can also create a brand new report using the “Report creation wizard”, or by dragging and dropping whatever custom fields you want to include.
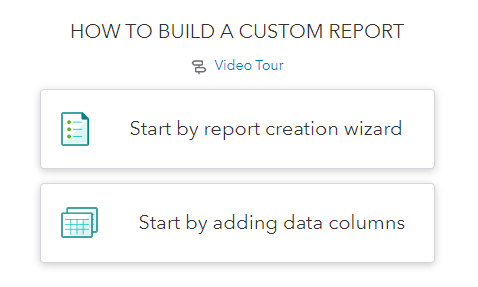
Once you’re done, be sure to click “Save”.
Conversely, if you use QuickBooks Desktop, all you need to do is:
- Run your chosen report.
- Select “Customize Report”.
- Update the tabs you want changed and select “OK” to save the report.
Gain control over QuickBooks reports with Method
Even if you know all the steps to automate your reports, you might still find that QuickBooks is too overwhelming, or that it lacks customization capabilities.
If you relate to either of these setbacks, Method is your best option to expand your QuickBooks reports and make the process more manageable.
Designed with scaling businesses in mind, Method’s Web Report Designer allows you to:
- Create personalized reports with an intuitive drag-and-drop interface.
- Merge various data types into single, comprehensive reports.
- Include both transaction and non-transaction data.
As a bonus, Method syncs all your QuickBooks data in real time, enabling live reporting without the constraints typically associated with QuickBooks automated reports.
The benefits of custom automated reports in QuickBooks
Tailoring QuickBooks reports to your business’ unique needs opens the door to plenty of benefits, including:
- Flexible data analytics that transform raw figures into actionable insights.
- A deeper understanding of your financial standing to help you make informed decisions.
With QuickBooks report automation, you can track the metrics that matter most to your business, identify trends, and tackle issues before they escalate.
Go beyond QuickBooks automated reports with Method
If you want to take your reporting capabilities further, Method gives you an additional layer of customization and control.
Beyond enhancing QuickBooks automated reports, its native, two-way sync with your accounting software ensures that your team can access real-time financial and customer data. This also lets you:
- Empower your team with the data they need to do their best work.
- Personalize invoices and estimates with your branding and custom fields.
- Automate workflows from lead management to payment collection.
- Ensure your QuickBooks files are up-to-date and secure.
By integrating Method with QuickBooks, you streamline your customer experience and operations.
Automate your way to stress-free days with your free trial of Method!
Image credit: janoon028 via freepik


