
9 out of 10 marketers agree that personalization increases profitability. So, it’s a good idea to customize your forms to reflect your brand and personalize your customer experience.
QuickBooks Online is a comprehensive accounting software that helps businesses simplify and manage their finances. But did you know that it also has customizable forms?
QuickBooks Online custom form styles let you personalize your documents with the look and feel you want.
In this blog, you’ll learn:
- What custom form styles QuickBooks Online are.
- What you can personalize in QuickBooks Online.
- Why you should bother with QuickBooks Online custom forms.
- How to create custom form styles in QuickBooks Online.
You’ll also learn about the best tool to help you with personalization.
Let’s get started!
What are custom form styles in QuickBooks Online?
Custom form styles in QuickBooks Online are customization options that allow you to change the appearance and layout of your transaction forms, such as:
- Invoices.
- Sales receipts.
- Estimates.
With QuickBooks Online forms customization, you can integrate your business’ branding into your transaction forms.
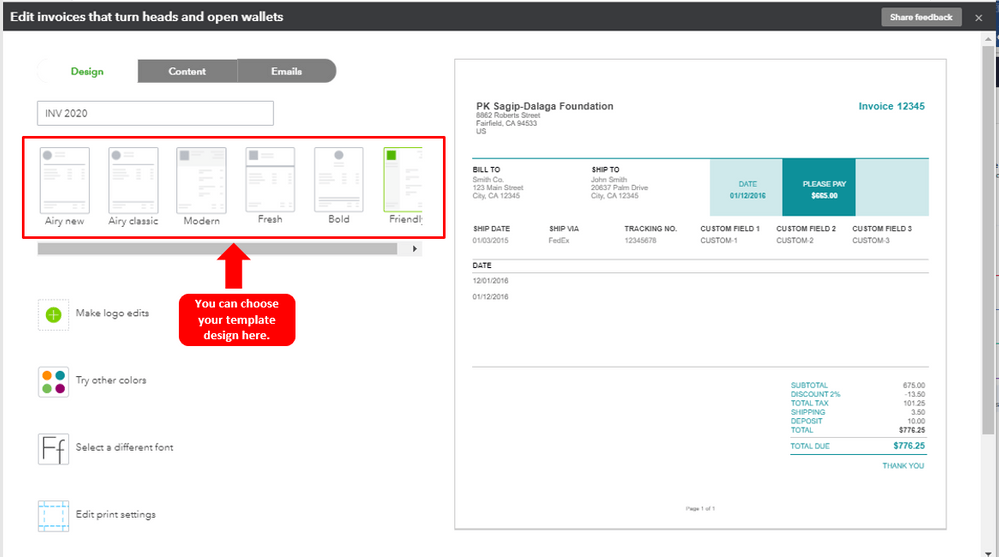
You can also tailor forms to your specific needs. For example, you might want to arrange the elements in your invoice differently than in your sales receipt. QuickBooks Online forms customization lets you choose from different invoice templates.
QuickBooks Online custom forms reflect professionalism and give your clients clarity by organizing the information and emphasizing essential details.
What can you personalize in QuickBooks Online?
Drawing from our experience, you’ll want to take advantage of QuickBooks Online custom forms’ flexibility. Here are some ways to personalize your forms:
- Add your logo to give forms a professional look and reinforce your brand.
- Use your brand colors and fonts that are consistent with its aesthetic.
- Use QuickBooks template invoice custom fields to add information specific to your business.
- Include an invoice number for tracking and specify the date of issue.
- Outline your payment terms, like due dates and late payment policies.
- Include personalized messages and space for physical signatures.
A little customization goes a long way in improving your brand reputation and customer experience.
QuickBooks Online custom forms: Why bother?
The importance of using custom form styles in QuickBooks Online extends beyond just visuals. Here’s why you should bother with custom form styles QuickBooks Online:
Branding consistency: QuickBooks Online forms customization ensures a consistent identity for your customers.
Improved communication: Well-structured and customized forms make it easy for customers to understand information.
Customer satisfaction: Detailed and professional-looking forms enhance customer satisfaction and experience.
Streamlined processes: Since QuickBooks Online forms customization lets you incorporate information tailored to your business processes, it simplifies your operations.
Flexibility: You can tweak forms according to specific needs and make changes so they always align with your business requirements.
QuickBooks Online forms customization: Where to go
So you’ve learned about the advantages of customization and you’re ready to harness the power of custom form styles in QuickBooks Online. Here’s where to go next.
How to create custom form styles in QuickBooks Online
You’ve learned that custom form styles in QuickBooks Online give your business documents a cohesive and credible image. Here’s how to navigate the custom form styles QuickBooks Online offers, step by step:
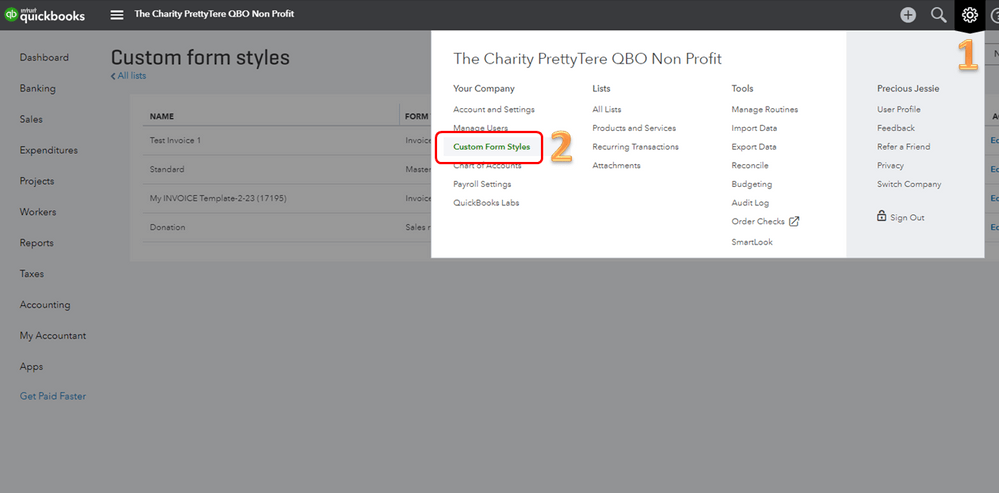
Step 1: Log in to QuickBooks Online. Navigate to the “Custom Form Styles” section and click the gear icon in the upper right-hand corner. This opens the Settings menu.
Step 2: In the “Your Company” section, select “Custom Form Styles.”
Step 3: Click on the “New style” button. Choose the form you want to customize by clicking “Invoice,” “Estimate,” or “Sales Receipt.”
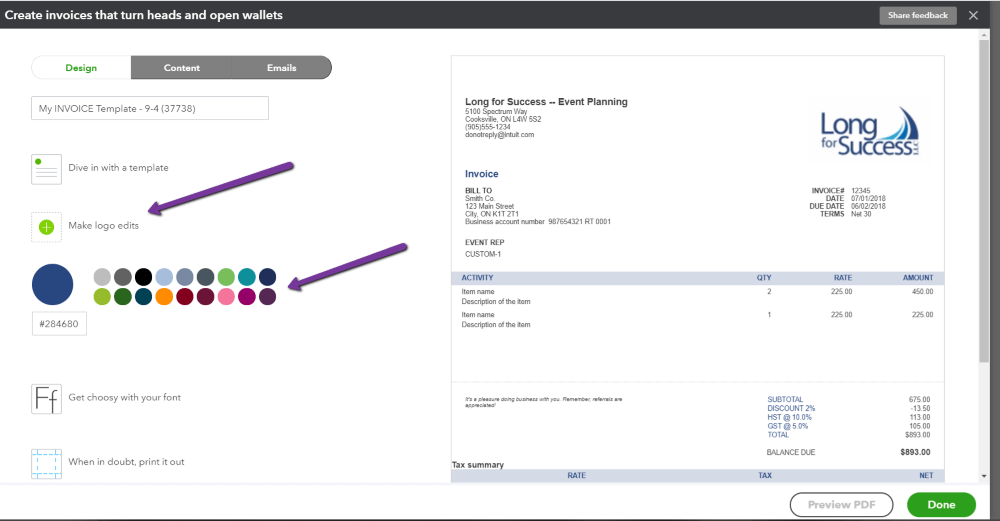
Step 4: In the custom style editor, name your style at the top of the page to identify it easily in the future.
Step 5: Use the different tabs to customize the design aspects, message, and content of your form.
Step 6: Preview your style, and when you’re satisfied with your customization, click the “Done” button to save your custom form style.
Now, when you create a new transaction, like an invoice or sales receipt, you can choose your custom form style from the “Customize” drop-down menu.
Remember that QuickBooks Online might limit the number of custom form styles you can create depending on your subscription plan, so make sure to check your plan details if you run into any issues.
Enhance your personalization with Method — the #1 automation tool for QuickBooks users
Method CRM is the best tool for QuickBooks users to take forms like invoices to the next level.
It seamlessly integrates with QuickBooks and elevates personalization with these key features:
- Drag-and-drop customization to tailor your forms to specific needs.
- Real-time sync with QuickBooks so your records are always accurate and up to date.
- 360-degree customer views empower you to create highly personalized forms that resonate with your clients’ preferences.
See how you can let Method do for you what pens, paper, and sticky notes just can’t.
Image credit: rawpixel via freepik