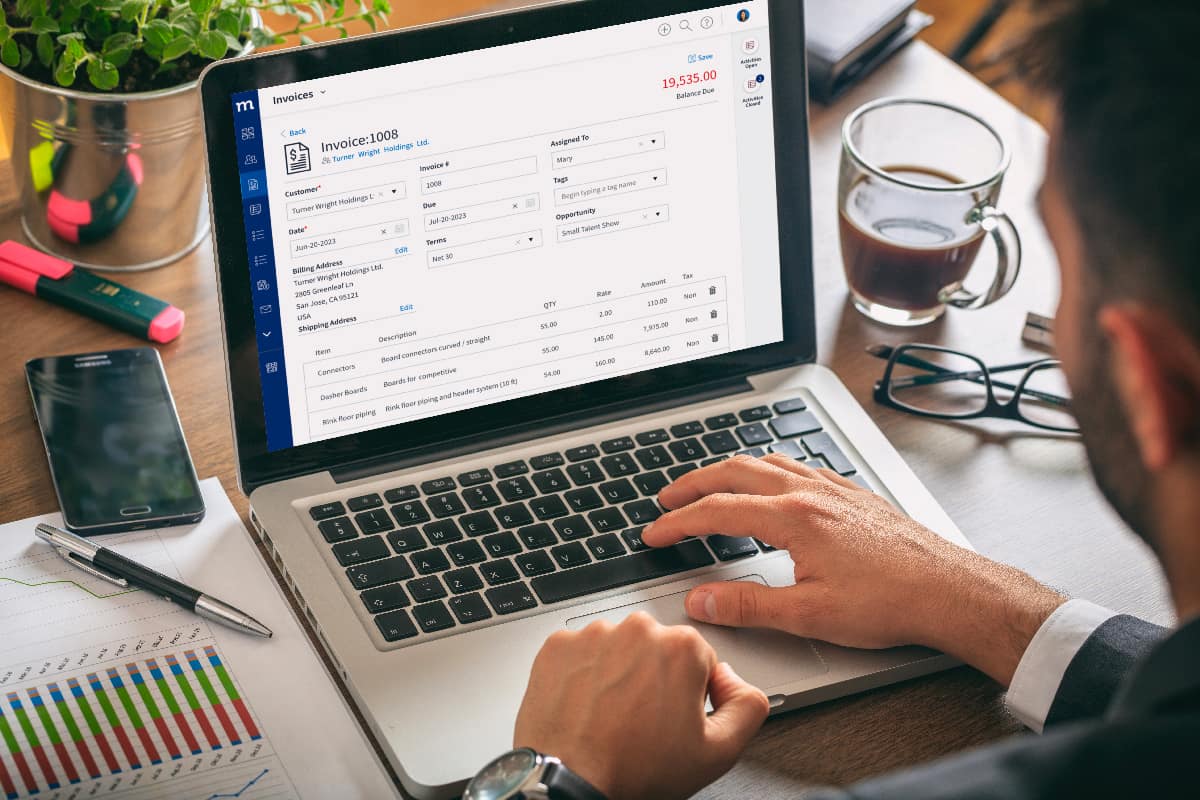
Invoicing is a vital part of running a business. After all, it’s not just how you get paid — proper invoicing also communicates to your clients what they owe and when it’s due.
Transparency with your customers is why having an efficient invoicing system is crucial.
QuickBooks offers invoice templates with customization options that you can leverage to reflect your brand.
In this blog, you’ll get a close look at QuickBooks invoice templates and learn how to edit invoice template in QuickBooks to ensure yours stand out.
What is a QuickBooks invoice template?
As a business owner, tracking and recording payments is challenging.
But learning how to edit QuickBooks invoice template is an easy way of maintaining accurate records and tracking payments.
It allows you to reduce manual work and create professional invoices that include:
- Detailed information about the products or services.
- Accepted payment mode, currency, and payment terms.
- Other necessary details.
Plus, your transactions are organized in one place through QuickBooks edit invoice template.
These templates are ready to use, and you can customize them according to your needs by making design or structure changes.
Creating these personalized communications will:
- Improve customer satisfaction
- Strengthen customer relationships
- Add credibility to your invoices.
Now let’s find out how to edit invoice template in QuickBooks!
How to edit invoice template in QuickBooks
How to change your invoice template in QuickBooks
Step 1: Start by opening QuickBooks, then go to the ‘Customers menu.’ From there, click on ‘Create Invoices.’
Step 2: At the top of the ‘Create Invoices’ window, find the Formatting tab and click on it. A drop down menu will appear. From there, select ‘Manage Templates.’
Step 3: In the ‘Manage Templates’ window, you’ll see a list of all existing invoice templates. Scroll through and select the one you wish to modify, then click ‘OK.’
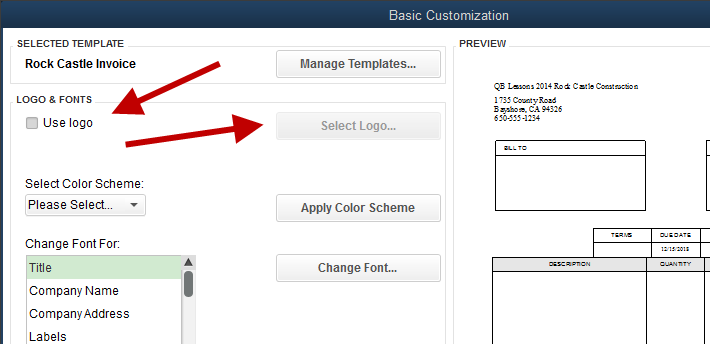
Step 4: After selecting a QuickBooks edit invoice template, the ‘Basic Customization’ window will open. Here, you can add your company logo and tweak your invoice appearance to match your brand. Select ‘Additional Customization’ to control the layout and content.
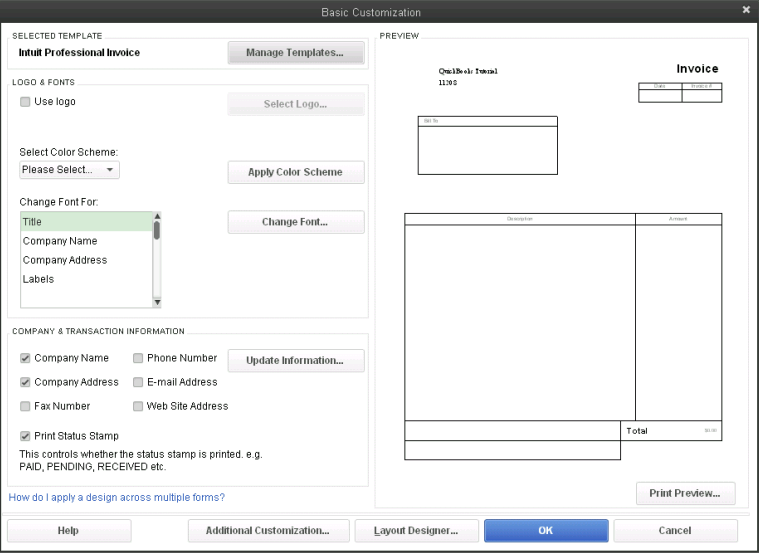
Step 5: Once you’re happy with your customization, click ‘OK’ to save your changes. Your QuickBooks edit invoice template is now ready to use for your future invoices.
Now that you know how to edit invoice template in QuickBooks, let’s look at some more functions.
How to duplicate a form template
Duplicating a form template can be a great way to save time and energy when using QuickBooks edit invoice template to create a new form. It’s handy when you need lots of forms based on one design or style with slightly different information.
For example, if you want to know how to edit QuickBooks invoice template for packing slips, follow these steps:
Step 1: Navigate to your ‘Lists’ menu and select ‘Templates.’ From there, find the template you need to duplicate and select it.
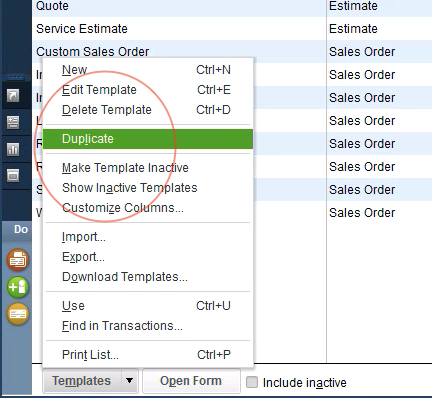
Step 2: Choose ‘Duplicate’ from the ‘Templates’ dropdown. This creates an exact copy of your original template you can edit for different purposes, instead of making one from scratch.
How to import or export form templates
Importing or exporting form templates adds convenience to the QuickBooks edit invoice template process.
Here’s how to import a template:
Step 1: Start by opening the company file that you want to use the template on.
Step 2: Under the ‘Lists’ menu, click on the ‘Templates’ dropdown. Choose ‘Import.’
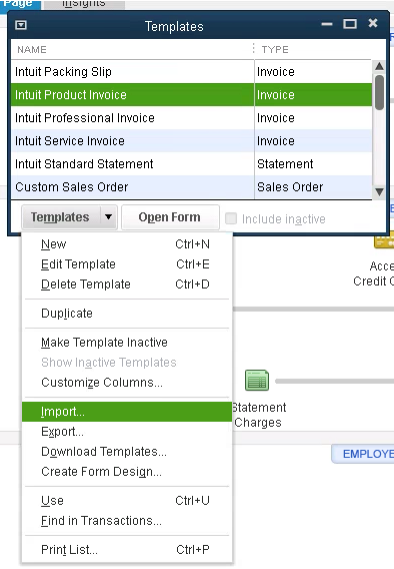
Step 3: Pick the template you want to import, then select ‘Open’. You can give your imported template a new name or keep the original.
Step 4: Click ‘OK.’ You’ll now find your newly imported template in your template list.
To export a template:
Step 1: Go to ‘Templates’ from the ‘Lists’ menu and choose the template you want to export.
Step 2: Hit the ‘Templates’ dropdown, then select ‘Export.’
Step 3: Confirm the file name and decide its location on your PC. Click ‘Save’ to complete the export.
How to change invoice number sequence in QuickBooks
Changing the invoice number sequence in QuickBooks is quick and simple with a few steps. Here’s how:
Step 1: First, log in to your QuickBooks account and click on the gear icon at the top of the page. This will open up settings for accounting, as well as options for sales form entry.
Step 2: Under the custom numbering section, tick the box beside ‘Customer transaction numbers’ and select ‘Save.’ This allows you to edit existing invoice numbers when creating new or editing existing invoices before saving or sending them. After hitting ‘Save,’ you have complete control of your invoice number sequence.

Ways to personalize your QuickBooks invoice
When learning how to edit invoice template in QuickBooks, make sure you customize them to your business. After all, it’s a great way to add a personal touch to your invoices.
A personalized invoice helps you:
- Present your business professionally
- Strengthen your brand identity.
Here are some ways you can personalize your QuickBooks edit invoice template:
Add your logo and branding
QuickBooks allows you to quickly:
- Add your logo
- Align it as desired
- Adjust its size.
Here’s how:
Step 1: Navigate to the ‘Customers’ menu and click ‘Create Invoices.’ From there, select the ‘Formatting’ tab and choose ‘Manage Templates.’ You will see a list of available templates; select the one you want to change.
Step 2: Next, add your logo. In the Basic Customization window, you’ll find a checkbox labeled ‘Use logo.’ Check this box, and a window will appear where you can upload your logo. Click ‘Select Logo’ and browse your computer for the appropriate file.
Step 3: After adding your logo, you can adjust its size and placement. QuickBooks automatically resizes the logo to fit, but you can manually adjust it if needed. Make sure your logo looks clear.
Adding your logo is one of many ways to incorporate your brand into your invoices. Here are some other ways to add your branding when you use QuickBooks edit invoice template:
- Choose a consistent color scheme that matches your brand.
- Select a font that is professional and fits your brand.
- Add a personal message, such as a thank-you note or your company’s tagline.
Remember, every point of contact with your customers is a branding opportunity – make it count!
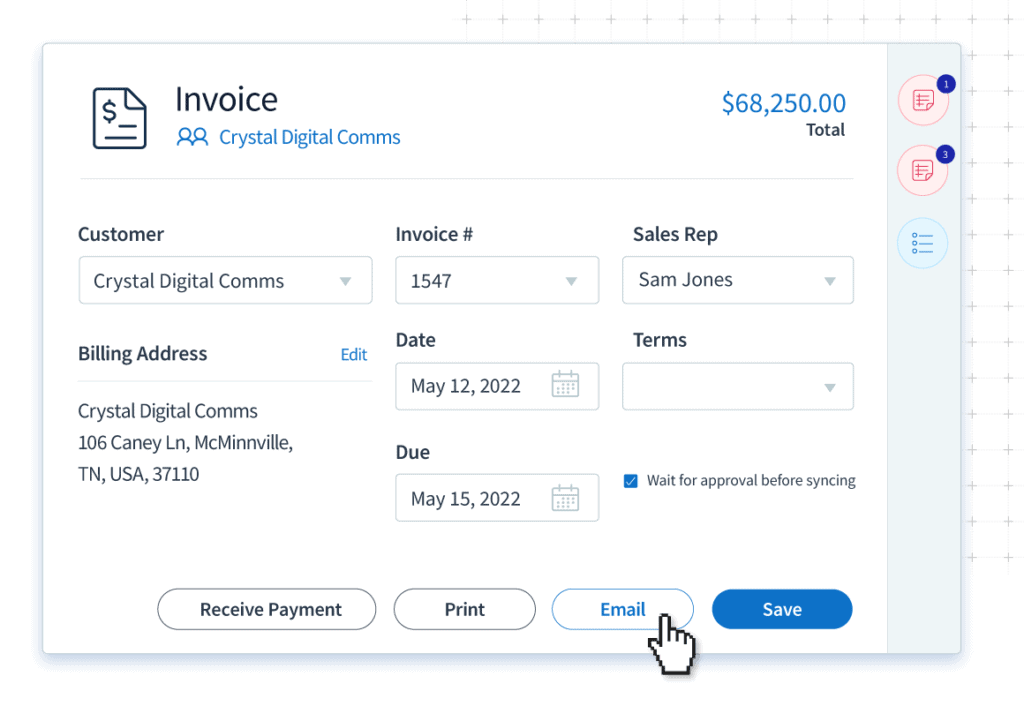
Tailor your invoices to your business with Method
Flexible software like Method simplifies your invoice customization. Let Method take care of your invoice personalization with its customization features including:
- Custom fields that let you include all the necessary information for your clients.
- An integrated CRM that links your invoices with your CRM data. This allows for automation and personalized communication.
- Links for online payments that simplify the payment process for customers and encourage timely payments.
Method’s powerful features empower you to design invoices that accurately represent your business.
How to edit invoice template in QuickBooks FAQs
Can I edit the invoice number field in QuickBooks Online?
QuickBooks Online lets you edit the invoice number field easily. To begin, access the settings menu by selecting the gear icon at the top of the toolbar. This directs you to a menu where you can select your account.
In this menu, click the ‘Sales’ option, followed by the pencil-shaped icon. This brings up your associated sales forms and an option to edit custom transaction numbers associated with each type.
Can you change the margins on a QuickBooks Invoice?
Yes, you can change the margins of a QuickBooks Desktop invoice when you go to print the invoice. Here are the steps to adjust them:
- From the ‘File’ menu, choose ‘Printer Setup.’
- In the ‘Form Name’ dropdown list, select ‘Invoice.’
- Click on the ‘Margins/Fonts’ button.
- Here, you can adjust the margins for all sides of the page.
- Once you’ve made adjustments, click ‘OK’ to save the changes.
Can I edit the products on my QuickBooks invoice?
Yes, you can edit the products on your QuickBooks invoice. This QuickBooks edit invoice template function lets you bill clients for the correct products or services. Here’s how to do it:
- Open the invoice you want to edit.
- In the details section of the invoice, you’ll see a list of products or services. To edit a product, click on the line item you want to change.
- You can then change the product’s description, rate, or quantity.
- Once you’ve made the necessary changes, click “Save & Close.”
See how you get faster payments through invoicing with Method.
Image credit: Rawf8 via Adobe Stock


